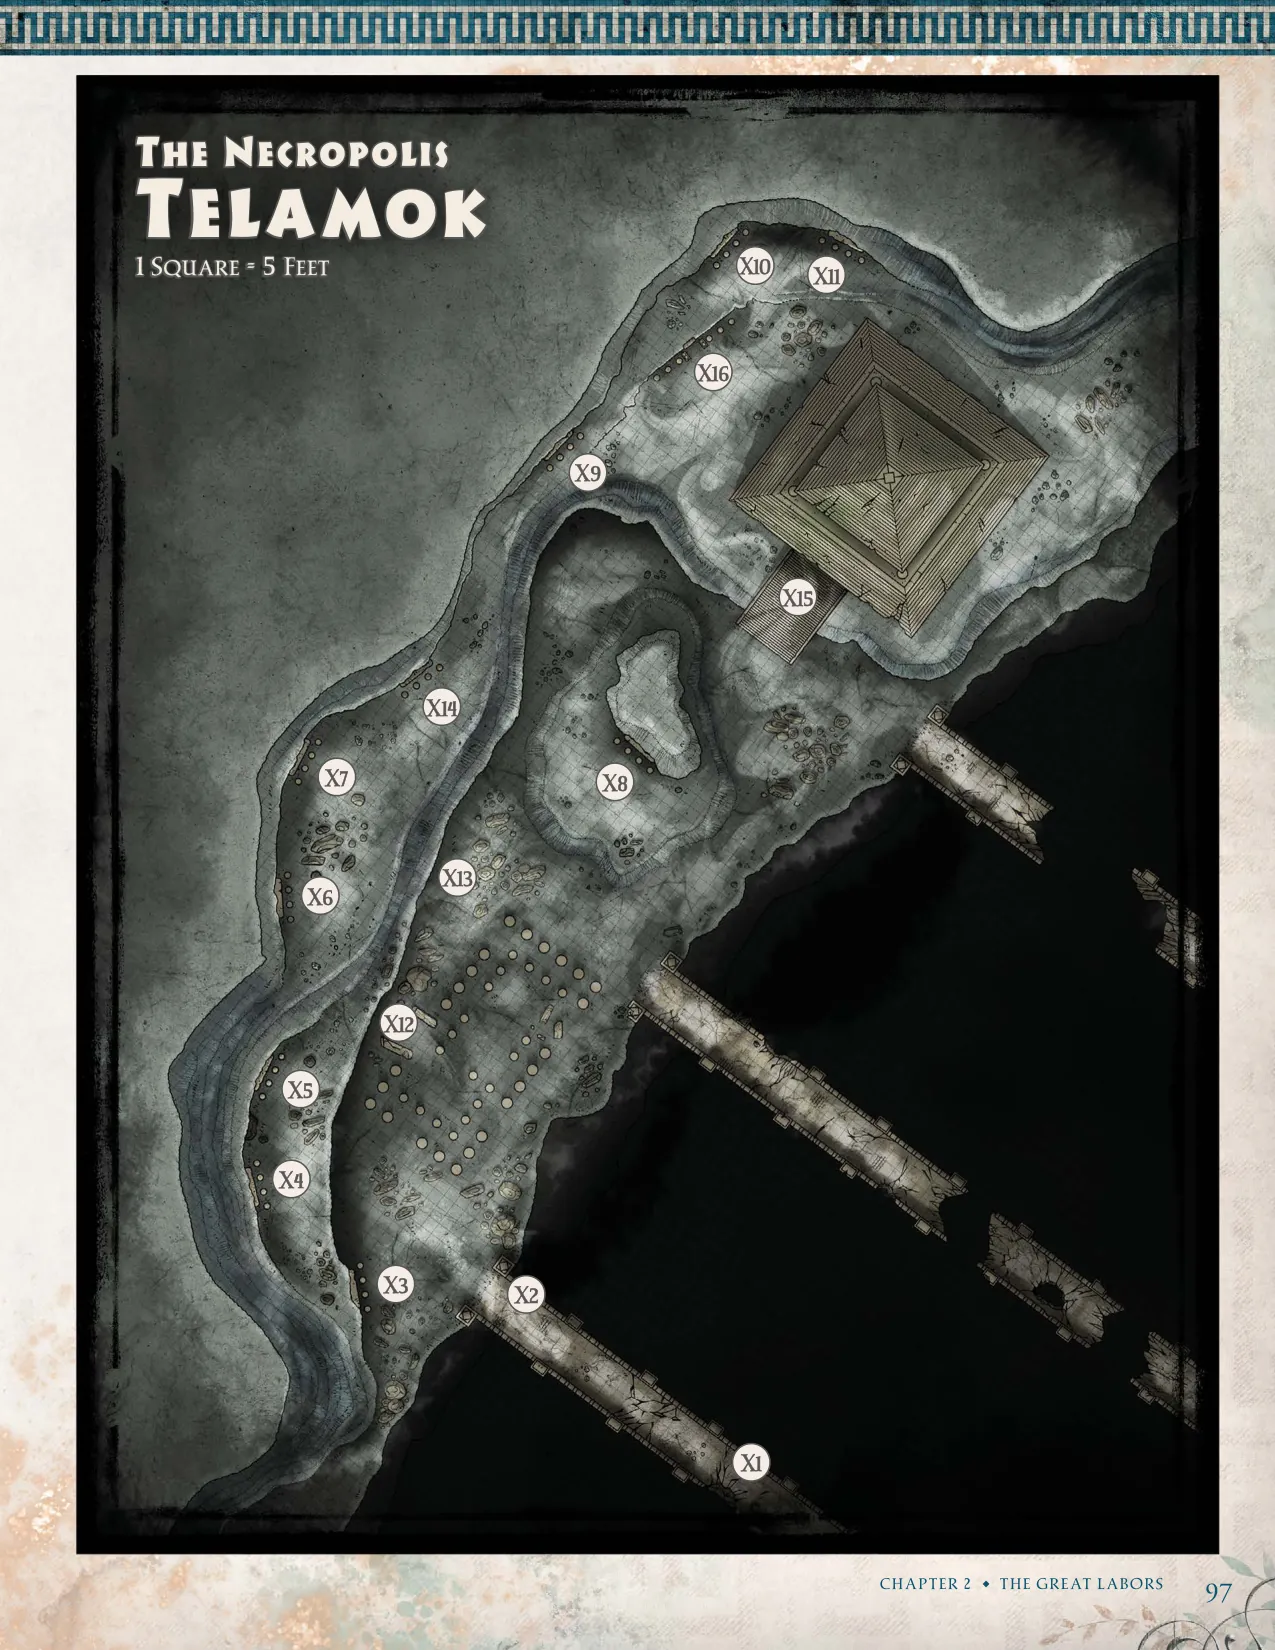
High in the icy reaches of the Mithral Mountains lies Telamok—a necropolis carved into stone and silence, where the breath of the dead lingers in every shadow. Built to honor the Dragonlords, this sacred site clings to the edge of a canyon so vast it seems to swallow the sky. Time-worn bridges span the chasm, leading to cliffs pierced by tombs older than memory.
Here, beneath a shroud of snow and mist, rest the greatest heroes of a lost age. The Dragonlords, conquerors of Titans and founders of empires, lie entombed in crypts untouched by sun or time. Their guardian is silence. No birds call. No wind howls.
To enter Telamok is to step into a world abandoned by the living—a place where history is buried in frost, and every stone echoes with ancient oaths.
The History of the Necropolis#
The Necropolis was built to house the remains of the Dragonlords who came to Thylea five centuries ago. Xander Huorath, the first and greatest of the Dragonlords, is buried at the center of the Necropolis. In addition to the Dragonlords, the skeletal remains of Balmytria, the silver dragon, are entombed here.
This ‘city of the dead’ is regarded as a sacred place, forbidden to anyone except other Dragonlords. It is guarded by Damon, a lich. He was Xander’s friend and the most powerful wizard of his day. Since he achieved undeath, he has seen all of his friends pass into the afterlife and now makes sure no one loots the city’s treasures.
Armaments of the Dragonlords#
One of the party’s Great Labors requires them to recover the armaments of the first Dragonlord. Xander’s armaments are still located in his crypt. The Axe of Xander and the Shield of Volkan have been looted by the minotaur Graxis, while the Breastplate of Mytros is still on the corpse of Xander in his sarcophagus. See appendix C for more on these items.

Traveling to the Necropolis#
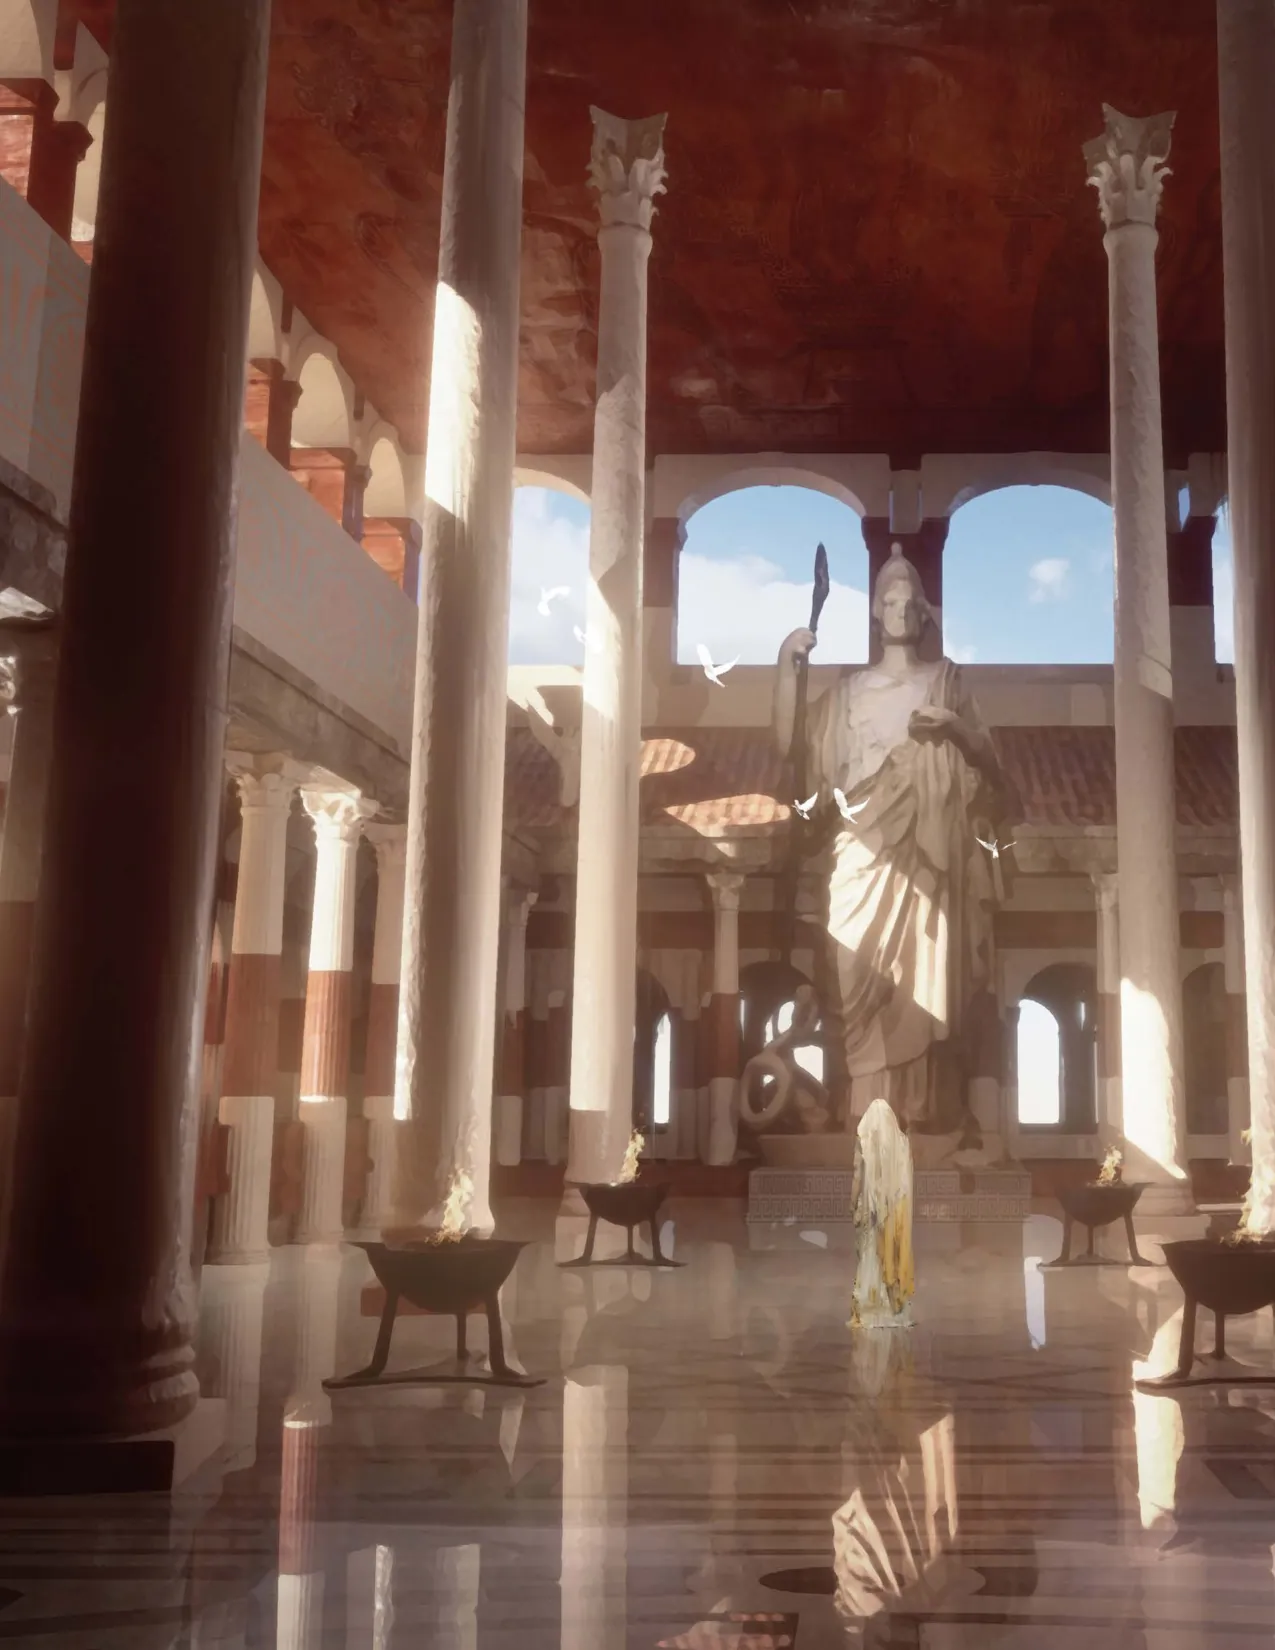
Encounter: Arms of Kentimane#
These statues are the arms of Kentimane, the Hundred Handed Titan. They cannot be damaged and they will not move against the heroes.
The Path of the Dead#
Partway up the mountain, three Harpies begin to harass the heroes. They have nested on the cliff opposite the mountain path, and they use their Luring Song to ensnare hapless travelers.
Dangerous Ledge. Those affected by the song will try to leap the chasm to reach the harpies’ nest. Before making the leap, an affected character can make another Wisdom saving throw to shake off the charm. Failing that, they must make a DC 15 Strength (Athletics) check to successfully leap from the path to the nest. Any character who fails the leap falls 50 feet to a ledge below and suffers 5d6 Bludgeoning damage.
Valleys Shrouded in Mist#
The mountain is surrounded by deep valleys that are forever shrouded in mist. The valleys are empty of living creatures, but they are patrolled by those who died in the construction of the Necropolis. Anyone who climbs down to the valley floor is immediately swarmed by skeletons, minotaur skeletons, and specters.
The initial fight is against 1d4 Skeletons, but after two rounds, another 1d4 Skeletons and one Minotaur Skeleton will join the fight. Then, after another two rounds, 1d4 Skeletons and one Specter. After that, 1d4 Specters will join every round. Trying to climb up from the valley to the Necropolis is difficult—the sheer cliffs are 500 feet high. For the first 100 feet, anyone trying to climb will be harassed by specters.
Necropolis Key Locations#
X1: The Approach#
The approach to the ruins is a paved path, covered lightly by snow. A successful DC 15 Wisdom (Survival) check reveals tracks that look like they were made by a two-legged bull, and they run to and from the Necropolis. If the check is made at DC 20 or higher, then the tracker will realize that a powerful minotaur made the tracks.
X2: Damon The Lich#
Damon (TN Lich) was a companion of the original Dragonlords who sailed across the ocean to Thylea. He lost everything in the First War, including his wife and children. He dedicated his life to the defense of the settlers, and now he defends the Necropolis to honor those who sacrificed their lives to do the same.
He is now a lich. The Necropolis is considered to be his lair, and he would be an incredibly difficult opponent for the heroes. He may use spells such as Hold Person and Wall of Force to prevent a battle, if the heroes are stupid enough to attack him.
Damon will only allow the party to pass the bridge if he is given a single Burnished Dragonlord Coin (appendix C).
Paying the Lich. If someone tries to pass without payment, Damon will use his magic to prevent them crossing. Initially he will only use Wall of Force, but he will also use non-lethal spells and powers such as Hold Person and paralyzing touch if necessary. He will fight to the death if threatened.
Anyone who tries to fly to the Necropolis without payment will be targeted by Damon. The one creature that Damon allows to pass at will is Graxis the minotaur.
The Necropolis Ruins#
The Necropolis is a dangerous place and many of the threats are too great for low level characters to handle. However, curious parties may attempt to loot the tombs anyway. There are various ways to dissuade this: desiccated bodies lie outside many of the tombs, looking as if they were ripped apart by some beast.
Tomb Exteriors#
The tombs are built into cliffs that are about 15 feet high. Most of the tombs have four marble pillars set into the cliff face. These pillars are entwined with dragons. Each tomb entrance is sealed with a chiseled marble slab measuring 5 feet wide, 5 feet tall, and 5 feet thick. Removing or resetting this stone slab requires an action and a successful DC 25 Strength check.
Warning Inscriptions. Each tomb inscription names the Dragonlord interred inside, along with a warning:
Kyrah warns the heroes of the dire consequences of robbing consecrated tombs. Plundering certain tombs will subject the heroes to the Curse of the Graverobber (appendix D).
Tomb Interiors#
Each tomb is the resting place of one Dragonlord. Their name, epitaph, and the warning are inscribed on the marble slab that blocks each entrance. Each tomb is a 15 by 15-foot chamber, and each contains a 5 by 8-foot rectangular marble sarcophagus.
Inside each sarcophagus is a Dragonlord and the treasure that was buried with them. Early Dragonlords were buried with mithral and adamantine items but, after the Mithral Mine was closed, those ores became rare. Later Dragonlords are buried with bronze items.
X3: The Tomb of Telamok#
The inscription on the tomb reads:
Telamok was a particularly vicious Dragonlord, known for never giving quarter in battle. He was responsible for some of the worst massacres during the First War, and was cursed to undeath as a result.
Telamok’s Sarcophagus. If his sarcophagus is opened, Telamok will rise as a Wight. He has maximum Hit Points (66), is dressed in a Breastplate with a Shield (AC 18), and has a Strength of 20. He will pursue anyone who breaks into his tomb for one minute. Afterwards, he will return to his tomb and reseal it.
Treasure. Telamok’s mithral Breastplate and Shield are worth 500 GP each. They are engraved with elaborate dragon motifs. This tomb is not consecrated.
X4: The Tomb of Adonis#
The inscription on the tomb reads:
Adonis was a Dragonlord who followed Xander across the oceans to Thylea. He was not particularly well liked by his peers, but he was known for his beauty and extreme wealth.
His tomb is a trap. If the sarcophagus is touched, a block of marble will seal the tomb.
Mercury Trap. From the space where the block dropped, mercury will pour into the chamber—enough to fill it entirely. It takes three rounds for the tomb to fill up, and each round, everyone inside must make a DC 15 Constitution saving throw or have the Poisoned condition. At the start of the fourth round, there is no more air. Use the drowning rules at this point. Heroes with the ability to breathe water will still drown in mercury.
Escaping the Trap. The only way to escape is with brute force. The marble block sealing the tomb must be moved with a successful DC 30 Strength check, or it must be destroyed in some way. The marble block has 100 HP, AC 17, and a damage threshold of 5. Treasure. Adonis is wearing a Breastplate, +1 and a Sword of Wounding (Shortsword). This tomb is consecrated, so taking either of these items will afflict the thief with the Curse of the Graverobber (appendix D).
X5: The Tomb of Estor#
The inscription on the tomb reads:
Estor Arkelander was the brother of Telamok, and one of the original Dragonlords who came to Thylea five centuries ago. His body was never interred here. He still captains the doomed ghost ship, the Ultros, as the heroes will discover later in the story.
Kyrah’s Reaction. Kyrah reacts coldly to the tomb. She still carries centuries of guilt about the atrocities committed by Estor during the First War. She has nothing to say about the tomb, and she has no desire to linger here any longer than she has to.
- Treasure. Estor’s sarcophagus is empty.

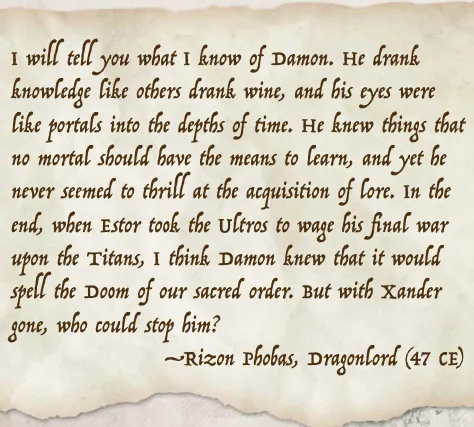
X6: The Tomb of Rizon#
The inscription on the tomb reads:
Rizon, a rival of Xander, was one of the riders who came to Thylea five centuries ago. She was largely responsible for the defeat of the minotaur armies in the First War. Her tomb is guarded by six Minotaur Skeletons. They stand guard beside her sarcophagus and will attack anyone who enters the chamber.
Treasure. Rizon’s Mithral Breastplate and Shield are worth 500 GP each. She also holds a Mithral Kopis (appendix C). This tomb is consecrated, so taking any of these items will afflict the thief with the Curse of the Graverobber (appendix D).
X7: The Tomb of Cosmo#
The inscription on the tomb reads:
Cosmo was the first-born son of Rizon. He succeeded Xander as the leader of the Dragonlords.
The interior walls, floor, and ceiling of the tomb are black in color and appear to be alive. This is because they are coated with five Black Puddings, one on each wall (but not the entrance wall) and one on the ceiling and floor. They will attack anyone who enters.
Treasure. Cosmo’s Adamantine Breastplate and Shield are worth 500 GP each. This tomb is not consecrated.
X8: The Tomb of Myrto#
The inscription on the tomb reads:
Myrto was the grandson of Adonis. He used his family wealth to bribe the other Dragonlords so that he would be elected leader after the death of Cosmo. The two statues of Myrto that flank his sarcophagus are Clay Golems that will attack anyone who enters the tomb.
Treasure. Myrto’s decorative Breastplate and Shield are useless in battle. They are forged from silver, gold, and platinum. They are worth 2,500 GP each. This tomb is not consecrated.
X9: The Tomb of Isadore#
The inscription reads:
Isadore was the granddaughter of Xander. Damon served as her chief advisor when she ruled the Dragonlords. After she died, Damon retreated from life in the city of Mytros and came to the Necropolis to be its guardian, and to watch over Isadore in particular.
Damon’s Alarm. Damon has the Alarm spell cast on the tomb. If anyone opens the tomb, the alarm goes off and the sound of a bell ringing will be heard. Spellcasters will recognize the sound as the Alarm spell with a successful DC 10 Intelligence (Arcana) check. A DC 15 check or higher will reveal that Damon was the likely caster.
Three rounds after the Alarm spell goes off, Damon will teleport in and use his full range of powers to destroy anyone still trespassing inside the tomb.
Treasure. Isadore wears a necklace worth 1,000 GP and five rings worth 200 GP each. Beside her body lies a Staff of Charming. This tomb is consecrated, so taking the staff will afflict the thief with the Curse of the Graverobber (appendix D).
X10: The Tomb of Lysis#
The inscription on the tomb reads:
Lysis was the great grandson of Estor, and he was the last of his family to rule Estoria. The Arkelanders had ruled the city as kings for over a century, but Lysis proved to be a mad tyrant who stained the throne with wanton murder and torture. The god Pythor, unable to stand by and watch, overthrew him and took the throne.
Treasure. Lysis’s bronze Breastplate and Shield are inscribed with platinum and are worth 500 GP each. This tomb is not consecrated.
X11: The Tomb of Ochos#
The inscription on the tomb reads:
Ochos is another in the Arkelander family, but he was a soldier rather than a king. A bronze statue of Ochos stands behind the sarcophagus, but it is actually a golem. Although the golem is made of bronze, it has all the statistics of an Iron Golem except that its AC is 18 rather than 20. The golem attacks anyone who removes an item from this tomb.
Treasure. Ochos wears a Breastplate, +2. He also has a bronze Shortsword and a Shield worth 250 GP each. This tomb is not consecrated.
X12: The Tomb of Dorion#
The inscription on the tomb reads:
Dorion Neurdagon was the last of his family to take up the mantle of Dragonlord. His tomb has been looted. The soot on the walls is from a fire-based trap that no longer works. Damon resealed the tomb not too long ago, but he could do nothing more. Dorion’s body is missing its head, and there is no treasure in the sarcophagus.
X13: The Tomb of Gregor#
The inscription reads:
Unlike the other tombs, this tomb does not have marble pillars. The body of Gregor of the Huorath family was never found. Although his tomb was prepared, it has always been empty.
X14: The Tomb of Nicholas#
The inscription on the tomb reads:
Nicholas was the very last of the Dragonlords. He ruled and died one century ago, though the order had long been corrupted at that point. In his lifetime, Nicholas
swore fealty to Sydon as a symbolic gesture of peace, earning the blessing of the Titan. The Order of Sydon modeled themselves after his example.
Teleportation Trap. This sarcophagus is protected by magic, and anyone touching it must make a DC 15 Charisma saving throw or be teleported to Sydon’s Throne Room in the Tower of Praxys (area S28 in chapter 5 of Odyssey of the Dragonlords) for 1 minute.
Sydon knows that whoever appears before him was desecrating the tomb of Nicholas Phobas, and he will use his full power to destroy the impudent tomb raider. After 1 minute, whether dead or alive, the victim of the trap is teleported back to the tomb. Once activated, this trap cannot be activated again for a full year.
Treasure. Nicholas has a bronze Breastplate and a platinum Shield inscribed with the symbol of Sydon. Each is worth 1,500 GP. There is also a single mithral ingot worth 500 GP.
X15: The Tomb of Balmytria#
This is the largest tomb in the Necropolis, as befits the burial place of a dragon. Some believe that it houses a passageway to the Underworld.
Investigation: Tomb Interior. If the heroes enter, read the following:
A huge marble block rests at the center of the mausoleum. This is where the body of Balmytria is interred. The block is 15 feet long, 10 feet wide, and 5 feet high. The block cannot be moved except by one of the Titans or by the Five Gods, but none are willing to disturb the resting place of Balmytria.
the bodies of Aetius, Pericles, and Eustace are all equipped with steel Breastplates, Shields, and Shortswords. All of the items are in perfect condition, but none are magical.
X17: The Hall of Xander#
Once lit by torchlight:
This hall has mosaics that illustrate the history of Xander and the Dragonlords who came to Thylea five centuries ago. The initial mosaics show great kings and queens granting Xander and his companions the ships and money needed to embark on a great voyage of discovery. Next, they show the five dragons making an alliance with Xander. The central mosaics show the discovery of Thylea, while
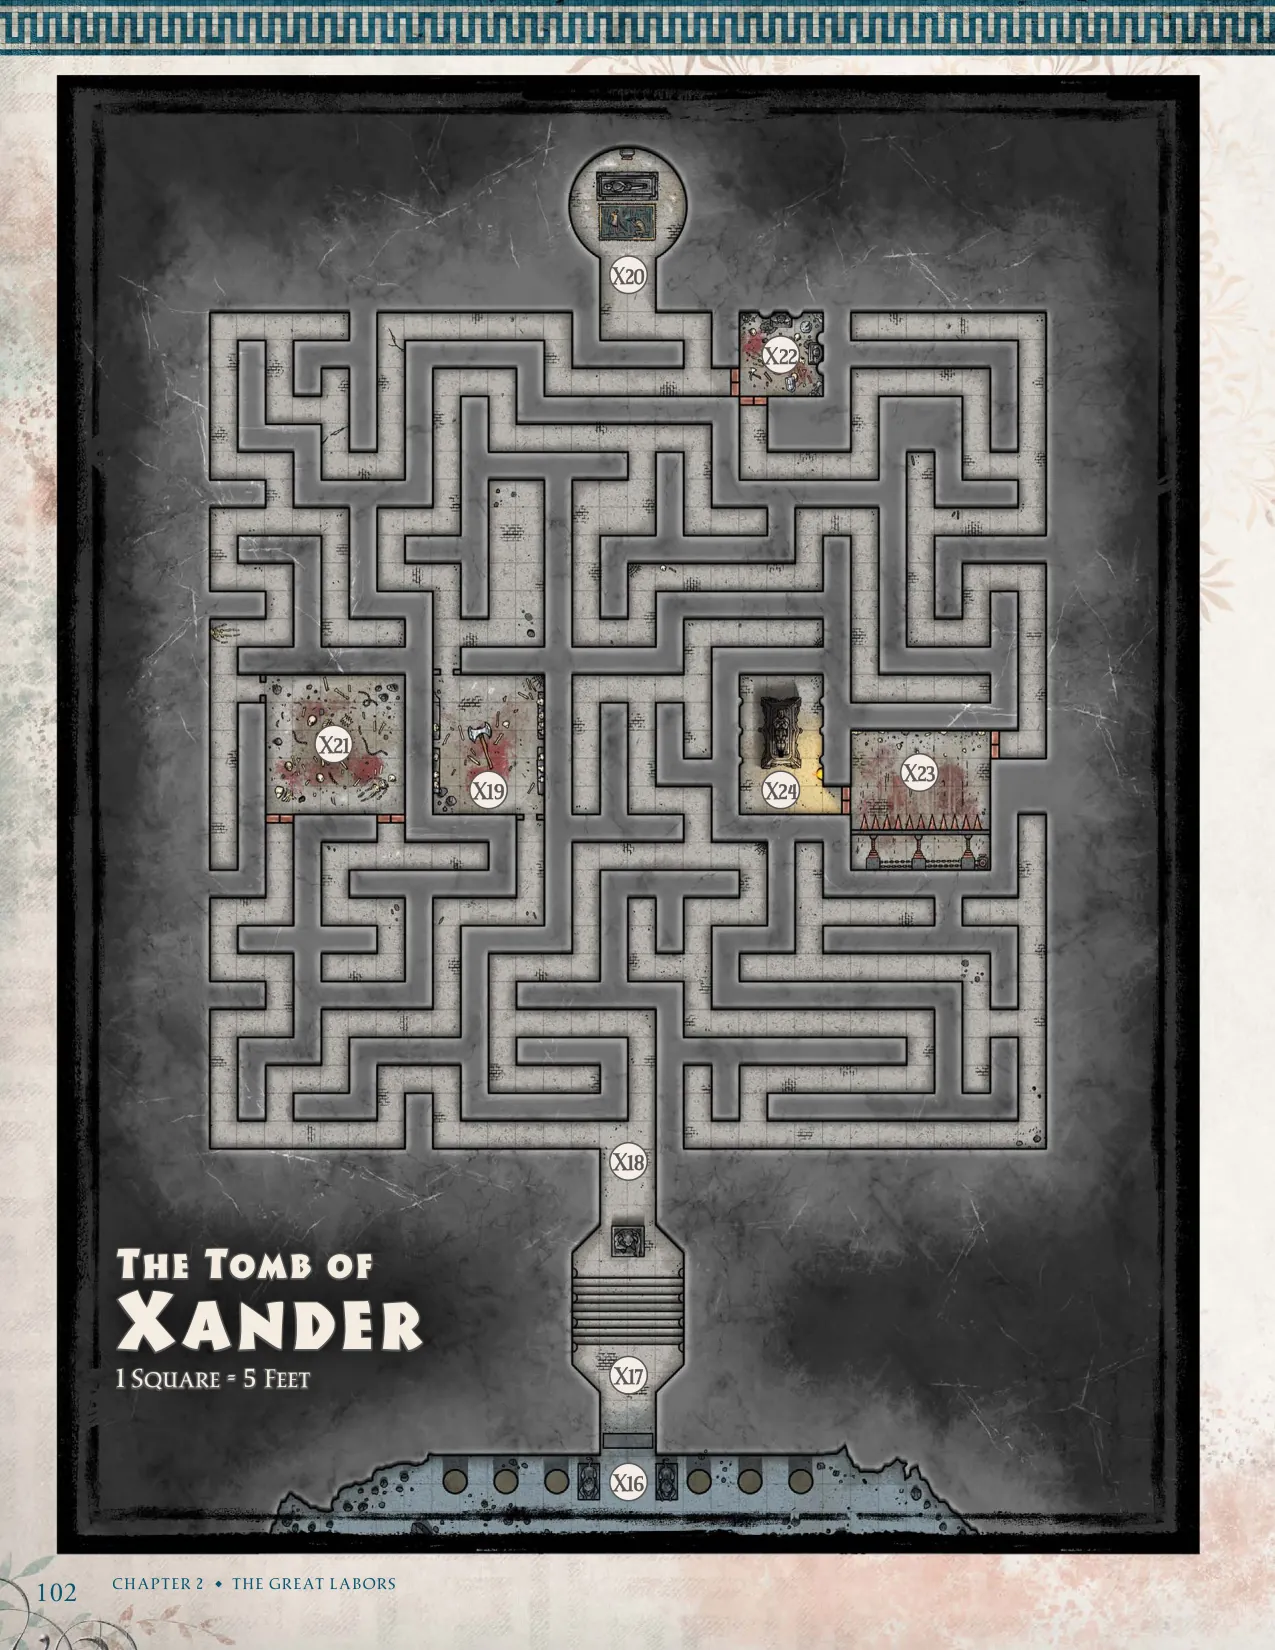
The Tomb of Xander#
This is the burial tomb of Xander Huorath, the first Dragonlord. The heroes must enter this tomb to claim his armaments in order to complete one of their Great Labors.
The tomb is guarded by Graxis, a powerful minotaur. He is the last of a bloodthirsty tribe that Lutheria created during the First War. After Rizon Phobas defeated them, Damon cursed the survivors to live forever as guardians of the Necropolis. Consequently, when these minotaurs die, they return as undead skeletons.
Graxis refused to share the fate of his kindred. He murdered them all and cannibalized their bodies, becoming immortal. He continues to stalk the region, searching for fresh meat. He despises Damon, Xander, and all the Dragonlords.
X16: The Tomb Entrance#
Xander’s tomb is sealed with a marble door that has an inset bronze handle. It can be pulled open with a successful DC 15 Strength check.
Lesser Tombs (Consecrated). Four lesser tombs are adjacent to Xander’s, for his closest companions and friends. Each one is sealed by a block of marble measuring 5 feet wide, 5 feet tall, and 5 feet thick. Removing or resetting one of these blocks requires an action and a successful DC 25 Strength check. There are three names inscribed on the tombs—Aetius, Pericles, and Eustace.
The last tomb is unlabeled and empty, because it was built for Damon but never used. Inside the three tombs,
the final ones detail the war of conquest against the inhabitants of Thylea, including the centaurs, minotaurs, and gygans.
An inscription above the stairs reads:
X18: The Catacomb Maze#
The maze is patrolled by two kinds of enemies.
Skeletons. These Skeletons wear Breastplates and use Shields, giving them AC 18. They patrol in groups of three, and they are trained in hoplite soldier tactics.
Minotaur Skeletons. The Minotaur Skeletons patrol in pairs, with one minotaur attacking the heroes from the front while the other comes from the rear.
Navigating the Labyrinth. You may choose to allow the party to try and navigate the labyrinth as if they were solving an actual maze, but this may take quite a bit of time. For a simpler approach, you might consider having the party stumble through the catacombs, discovering each area in the order that it has been presented (X19, X20, X21, etc.)
For every 5 minutes of exploration, roll on the following table. As an alternative, roll on the Labyrinth Encounters table when the heroes enter a new area in the maze.
X19: The Skeletal Minotaurs#
After 2 rounds:
The three Minotaur Skeletons are the only enemies in the room. They attack immediately, but will not leave the maze. Each carries a weathered bronze great axe.
X20: The False Tomb#
The inscription on the sarcophagus is written in Draconic, and it reads:
This room is a false tomb, and a trap for those who would loot Xander’s treasures. The sarcophagus is a Mimic and the rug is an Rug of Smothering. The first person to touch the sarcophagus will become stuck to it because of the mimic’s adhesive ability. The rug and mimic will then attack, surprising the party.
Bronze Doors. The bronze doors are barred from the other side and require a DC 30 Strength check to open. If the trap is triggered the doors will become unbarred, but will still be stuck and will still require a Strength check to open as discussed below.
Smash Trap. The trap works over 4 rounds. Have all players roll Initiative. On initiative 20 of the first round, a portcullis descends in the entrance, cutting off any retreat. The south wall then begins to push forward with a screech of metal against metal that heroes who pulled the lever in The False Tomb (area X20) will recognize.
On initiative count 10 of the second round, spikes protrude from the mouths of the wall carvings, dealing 10 (3d6) Piercing damage to everyone in the room (one time only). At initiative count 1 of the fourth round, anyone who is still alive in the room takes 32 (10d6) Bludgeoning damage as the wall smashes inward. Anyone reduced to 0 Hit Points is crushed to a paste. There are three ways to escape the trap:
Pulling the lever in The False Tomb (area X20) will
stop it. This causes the spikes and portcullis to return to their original positions, and the trap will remain inactive for a full hour. It is also possible to force open the bronze doors. A
successful DC 15 Strength (Athletics) check opens the door in 3 rounds. A check of 20+ opens the door in 2 rounds, while a check of 25+ opens them immediately. Lifting the portcullis requires a successful DC 25
Strength (Athletics) check.
Treasure. Scattered amongst the skeletal remains of the victims of the trap are 112 GP and 245 SP.
X24: Tomb of Xander#
The chamber is lit by a single Everburning Torch (appendix C). The lid of the sarcophagus weighs nearly a ton. It takes a combined Strength of 22 to slide the lid off the sarcophagus and, as soon as it is opened, if Graxis is alive, he will arrive to attack the heroes.
There is nothing of value here. The lever at the back resets The Trap (area X23). Whenever it is pulled, there is a screeching sound of metal against metal.
X21: Graxis’s Lair#
This room is Graxis’ lair. He goes hunting once a month and stores his kills in here. His curse prevents him from sleeping, so there is no place for him to rest. It is possible for heroes to set up an ambush here for Graxis.
Treasure. Graxis keeps baubles and coins that he has taken from those he has hunted and killed. In a bag he has 600 CP, 254 SP, 115 GP, and six pieces of jewelry worth 25 GP each.
X22: The Chamber of Supplicants#
After 2 rounds:
The six Skeletons in this room form up with three in front (to block anyone from getting past) and three behind. The front three skeletons use Breastplates, Shields, and Shortswords, while those in the rear ranks are armed with Pikes.
X23: The Trap#
This trap triggers when more than 300 pounds of weight have gathered in the room.
Graxis soon loses patience:
After two rounds of combat with Graxis, read the following at the start of the third round.
Without his weapon, Graxis can only use his Gore attack for the remainder of the battle.
Xander is a Wight with a Strength of 22 and maximum Hit Points (66). He wears the Breastplate of Mytros (AC 18), though the armor is badly dented. Xander’s alignment is true neutral, and he will not fight unless absolutely forced to by the party.
When Graxis is dead, Xander will stand up, silently remove his Breastplate, and lay it on the ground in front of his sarcophagus. This done, he will silently return to his sarcophagus and drag the lid back into place.
Treasure. Other than Xander’s famed equipment, there is no other treasure in the room. The Shield of Volkan (appendix C) can be looted from Graxis’s corpse.
The Armaments of the Dragonlord. Xander’s three legendary items radiate magic and can be attuned. The items are:
Axe of Xander
Breastplate of Mytros
Shield of Volkan
More details can be found in appendix C. However, the axe and the shield are badly damaged, and their magical properties aren’t working. These items must be taken to the Mithral Forge (area F21 in the Mithral Mines) for repair. Volkan must use Pythor’s Hammer (appendix C) to repair them. He can repair one item per week of work.