Key Locations#
DR1: Beach#
When the heroes arrive on one of the many beaches, read the following:
If the heroes search for any signs of life, a successful DC 12 Wisdom (Survival) check will reveal one of many paths leading into the interior of the island.
DR2: Forest Interior#
When the heroes travel through the interior forest of the island, whatever path they are using will quickly vanish, slowing their progress. Read the following:
The undergrowth isn’t natural but a result of Hexia’s foul influence. It makes progress into the island’s interior difficult, but not dangerous.
Event: Meeting the Elves. Hexia does not reveal herself while the heroes explore. She permits their landing and even their meeting with the elves, content to watch from afar. In her arrogance, she believes them harmless playthings, unworthy of notice until she chooses to strike. Yet in her confidence, she has overlooked that the elves may have ascertained that she has a weakness.
Within an hour of arriving on the island the heroes will be met by two elf warriors (LN Warrior Monk and NE Amazon Warrior) leading a band of a dozen elves (CG Tribal
- Hunters). All stat blocks can be found in appendix B.
The two elves introduce themselves as Darok (LN Warrior Monk) and Patrea (NE Amazon Warrior). They ask why the heroes have come to Hexia’s island. They have had no news of the mainland for centuries and are very much in the dark about the prophecy.
Darok and Patrea take the heroes to see the elvish elders in a nearby ruin.
DR3: Ruin#
Though the elves have no permanent home, they gather in these ancient ruins, relics of a civilization that once warred with the Gygan Empire (see DR4). When the
heroes arrive, the elders see divine purpose in them. They interpret the party’s arrival as a sign that the dragon must be confronted, once and for all. Their situation is desperate, and they have lived in fear for too long.
The elves know that slaying a fully grown dragon is nearly impossible; however, they believe Hexia may have a weakness. In the northern reaches of the island roams a beast known as a Shedu (appendix B**)**. It is a monstrous, bull-shaped creature with soot-black fur, twisted horns, and eyes that burn with endless rage. Though not as physically powerful as Hexia, the green dragon has fled at the mere sight of it. The reason for her fear remains a mystery, but the pattern is undeniable. Unfortunately, the shedu is no ally. It does not hunt for sustenance, but for sport; crushing elves beneath its hooves and tearing them apart with savage glee.
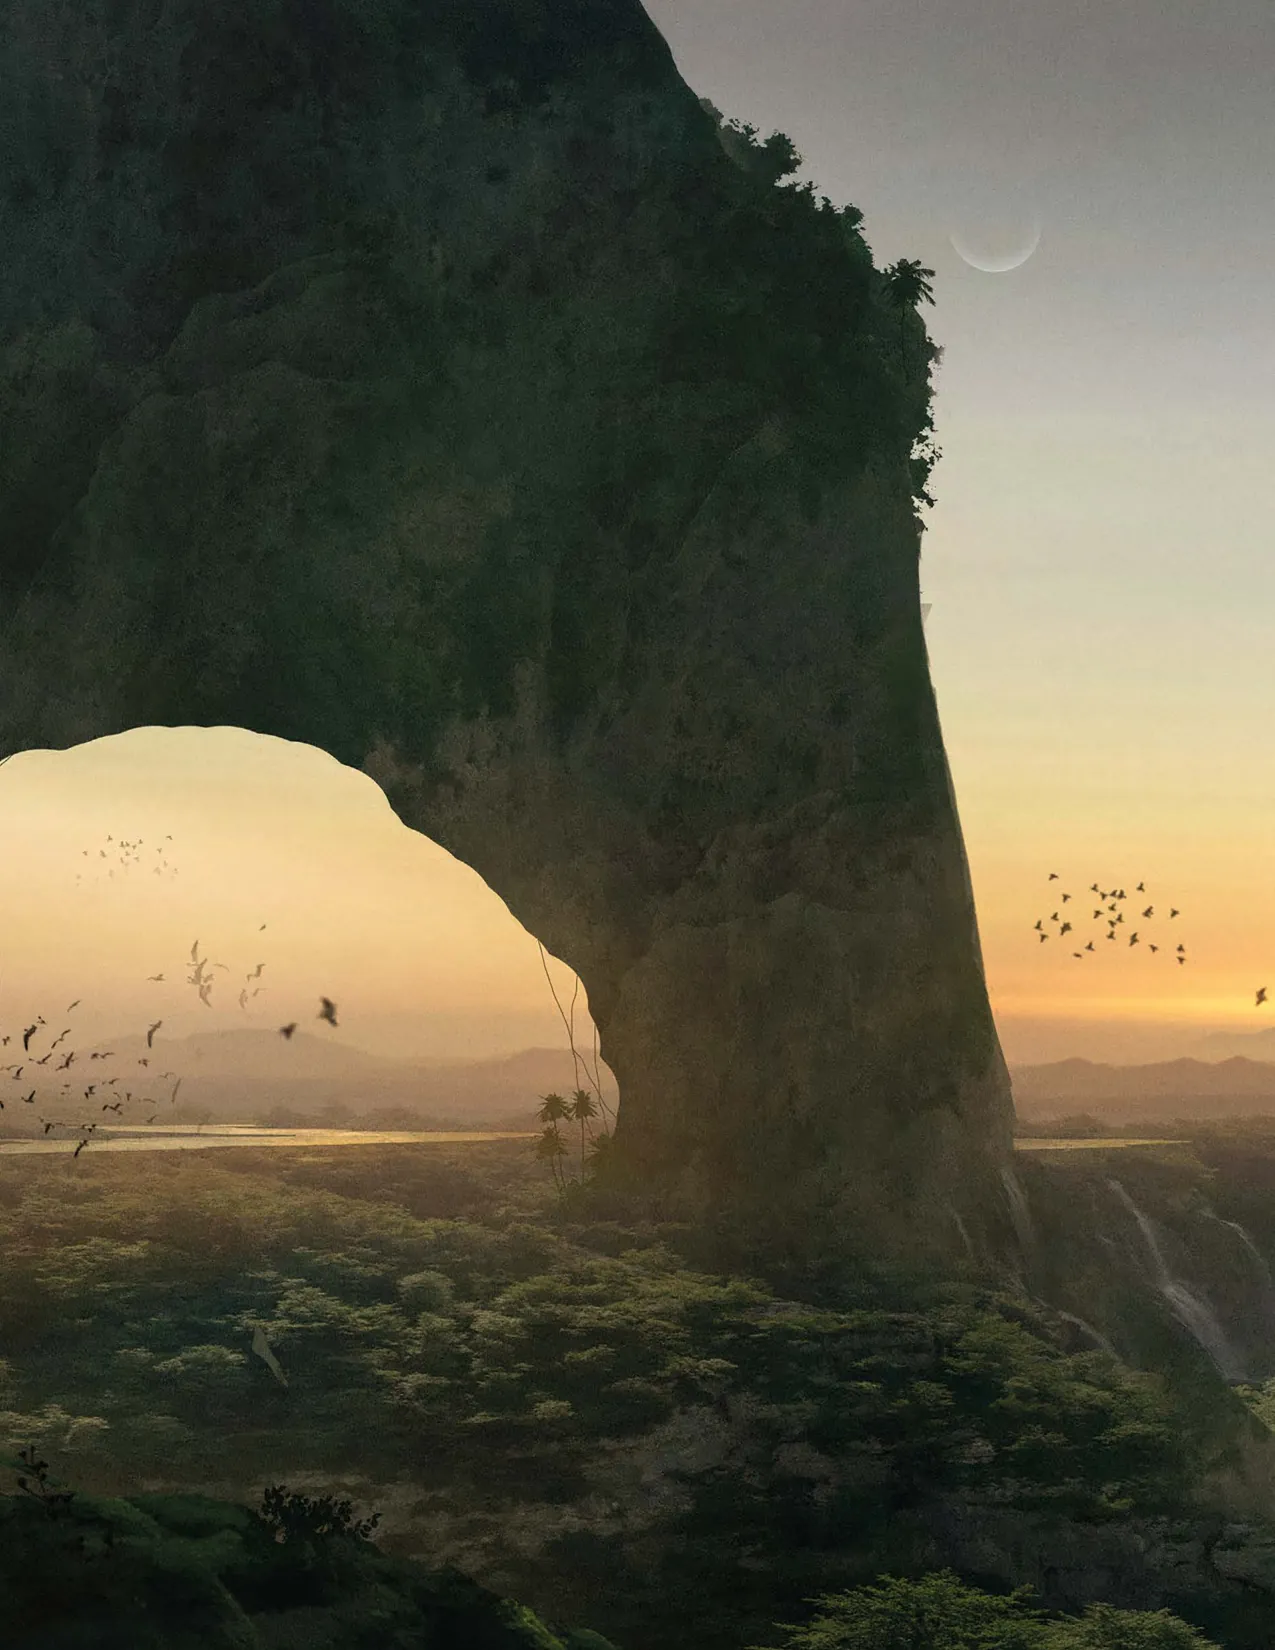
They encourage the heroes to investigate the creature’s lair, believing something within must aid in the fight against Hexia. The cave is not difficult to locate as it yawns from the side of a colossal natural stone arch at the northern edge of the central mountains, a landmark impossible to miss.
DR4: The Shedu#
Read the following when the heroes get close:
If the heroes decide to ascend the stairs to the cave opening, refer to Caverns of the Shedu later in this section.
DR5: Hexia’s Domain#
Hexia lives in a grove at the center of the island, halfway up the mountain. As the heroes get close to Hexia’s lair, they will find themselves in a labyrinth of thorny thickets. If the heroes finish a Long Rest in this area, they must succeed on a DC 15 Constitution saving throw or have the Poisoned condition for 1 hour.
Halfway through the thorny labyrinth, read the following:
If the heroes search the area, a successful DC 14 Wisdom (Survival) check reveals the tracks of greater basilisks.
These basilisks are Hexia’s pets. She has three of them that hunt the thorny maze for intruders. Within 1d4 rounds of coming across the statues, the three Greater
- Basilisks (appendix B) will emerge and attack.
DR6: Hexia’s Lair#
There are no trails leading to Hexia’s grove. Climbing the cliffs above and below it requires a successful DC 15 Strength (Athletics) check.
The cage will contain Pythor or Ophea if appropriate. Hexia is not visible at first. How things unfold depend on whether the Demi-god is present.

She does not question how the Demi-god survived, nor how they found her. She always believed they would. If Pythor is present, read the following:
Allow a few minutes of emotional roleplay. When you decide the moment is right, Hexia reveals herself.
There is a narrow chance for peace. The Demi-god may appeal to the love Hexia once felt for her adoptive family, her metallic upbringing, and the memory of who she was. A successful DC 20 Charisma (Persuasion) check softens her rage. If Pythor is present, the check is made with Advantage. If successful, Hexia snarls, coils back, and submits. She allows Ophea (and Pythor, if present) to leave, but demands the heroes depart her island immediately. This mercy condemns the island’s elves to remain her playthings forever.
In all other cases, she attacks and fights to the death. Hexia is an Adult Green Dragon and deadly foe.
If the Demi-god is Not Present. Hexia is coiled above the waterfall, perfectly still, scales blending with moss and leaves. She watches silently for a time. If the heroes disturb the hoard or attempt to free Pythor, she acts at once. Otherwise she reveals herself after a few minutes.
Hexia then attacks and fights to the death. As an Adult
- Green Dragon, Hexia makes a difficult foe. If Pythor is present, Hexia will go out of her way not to hurt him, even if he attacks her. Aftermath. If Hexia is slain and Ophea survives, she
embraces her child fully for the first time in decades. Tears streak her cheeks. She shares fragments of knowledge about the Forgotten Sea and its islands. She can give a vague description of each island.
She begs the Demi-god to succeed where Pythor failed, to save Thylea from the Titans. Then she insists on joining the journey aboard the Ultros. She will spend much of her time rebuilding Pythor’s confidence and rekindling the romance that existed between them.
Treasure Hoard. The crystal-clear pool is lined with 50,000 gold coins and 50,000 silver coins. Buried throughout the silver and gold coins are artifacts from Thylea’s history. The most valuable artifacts are a gold crown that was worn by one of the queens of Mytros (worth 7,500 GP), a platinum cup inset with emeralds with the images of the Five (worth 10,000 GP), and a gold dragon comb (worth 3,000 GP).
There are also two dozen less valuable objects, including bracelets, cups, rings, necklaces, and musical instruments (each worth 250 GP), and 80 pale green chrysoberyl gemstones (worth 100 GP each), 20 dark green alexandrites (worth 500 GP each), and 12 emeralds (worth 1,000 GP each). Finally, there is a single adamantine ingot.
DR7: Fumarolic Islet#
Hexia is not the only powerful creature that lairs on the island. The following encounter is entirely optional and is a challenge beyond the power of most heroes. Whether the elves or Hexia have discovered the existence of the Kraken is entirely up to you. The heroes might spot the islet from shore:
If the heroes decide to explore the island, refer to Lair of the Kraken later in this section.
Caverns of the Shedu#
The cavern entrance yawns three hundred feet above the jungle canopy, carved into the flank of the towering stone arch. Ages ago, this stone arch housed a malborne stronghold, long before their wars with the Gygan Empire forced them from Thylea. It was no garrison, but a hub of their most profitable and predatory trade. At its summit thrives the Golden Lotus, the malborne’s most coveted and insidious crop. Smoked, its petals granted waking dreams and rapture; with each breath, dependence tightened like a noose.
The noble houses did not simply sell the Lotus, they wielded it. Through its allure, they bent cities to their will, hollowed cultures from within, and amassed vast fortunes.
Whether the great arch is their work or a relic of something far older remains a mystery that only the Shedu (appendix B) dwelling within can answer.
Caverns General Features#
Yellow Mist. The floors of the cavern complex are covered in a yellow mist that flows toward area DS9. This is smoke from the Golden Lotus and can be dangerous if touched or inhaled; however, it is heavier than air and clings to the ground. If a hero interacts with the mist by touching it or breathing it in, they must succeed on a DC 10 Constitution saving throw or be Poisoned for 1 hour. While Poisoned in this way, they have the Incapacitated condition, as they experience euphoric dreams. If successful, for the next 1 minute the hero has Advantage on saving throws to avoid or end the Frightened condition.
Lighting. Dim Light is provided by the glowing yellow mist that flows along the cavern floors.
Ceilings. The ceilings are 20 feet high throughout.
Caverns of the Shedu#
1 Square = 5 Feet#
Caverns Key Locations#
DS1: Entrance#
The skeletal remains are all that is left of elvish prey that the shedu claimed years ago. The door is unlocked, but at its center is a seal depicting a city of towering spires. Ancient script is etched beneath the emblem. If the heroes use magic or some other means to read the script, it reads thus:
DS2: Box of Doom#
The door straight ahead is not locked; however the door to the left is locked. As an Action, a hero can use Thieves’ Tools to open the door with a successful DC 20 Dexterity check or force it open with a successful DC 25 Strength (Athletics) check. The door has AC 18, 60 Hit Points, and Immunity to Poison and Psychic damage.
As soon as someone enters the chamber the death’s head upon the coffer will speak to them.
The coffer, under the effects of the Magic Mouth spell, lies. Inside the coffer is a bloom of enchanted spores, a magical contagion known as Brittle Bones. The nobles of Calenhad Hourath bred immunity to it long ago. Anyone who opens the box exposes all creatures within 20 feet to the disease.
DS3: Dead Lamassu#
These remains belonged to a lamassu (appendix B). When the malborne abandoned Thylea millennia ago, they left the sacred guardian behind, tasked to watch over their stronghold until their return.
Centuries passed in solitude until Hexia arrived. The lamassu feared the dragon would uncover the stronghold and claim its treasures, so it sought to aid the island’s elves. In secret, it forged arrows blessed to pierce dragonhide. But before it could deliver its gift, Hexia descended in wrath and slew it.
What Hexia did not expect was what came next. From the lamassu’s ruined body rose a new creature, born not of flesh, but of wrath and hatred. A shedu (appendix B). Since that day, Hexia has avoided this place and the shedu.
DS4: The Source#
This is the source of the yellow mist. The steel lattice doesn’t open, but can be forced open with a successful DC 25 Strength (Athletics) check. The door has AC 18, 100 Hit Points, and Immunity to Poison and Psychic damage.
Beyond the lattice lies a circular chamber, open to a narrow shaft that rises all the way to the lotus fields atop the arch. A Barbed Devil stands within a permanent Magic Circle, bound in place. In ancient days, House Calenhad Hourath set it to process harvested Golden Lotus, sealing it here as a tireless servant. When the malborne fled, they neglected to dismiss their thrall.
Now the devil spends eternity burning each bundle of lotus that drops from above, its torment a cycle without end.
Should the heroes breach the lattice, the fiend pleads for release, promising knowledge or service. It lies with practiced ease. If freed, it immediately attacks, eager to force its own destruction and return to the Nine Hells rather than linger one heartbeat longer in this prison.
DS5: Hall of Lords#
The statues depict the patriarchs of the Calenhad Hourath line. Once, each pedestal bore the name of the honored dead, but long ago the shedu clawed every inscription away.
The twelve statues are all Bronze Automatons (appendix B). They were created to act as additional guardians, but over the millennia, most have ceased working. Even the skilled malborne artificers couldn’t build these
guardians to withstand the ravages of time.
When a creature reaches the halfway point of the hallway, the bronze automatons will attempt to animate. Read the following:
While on the surface the situation seems humorous, the heroes are in much more danger than they realize. Though the bronze automatons no longer move, their cores are intact. Each core is a volatile mixture of elemental fire and bottled lightning.
Worse still, two of the bronze automatons still function. These automatons will feign dysfunction, waiting to see how the heroes react. They are aware that they have little hope of overcoming the intruders in combat, but if a chain reaction of core explosions were set off, that might do the trick.
The ten automatons that are unable to move have the Incapacitated condition and are Bloodied (30 Hit Points).
DS6: Overlook#
The lamassu opened the sarcophagus to gain access to materials it needed to craft the Arrows of Dragon Slaying. There is nothing left except a mummified corpse.
DS7: Stairs#
The stairs ascend 700 feet to the top of the arch.
Top of the Arch. The stairs in areas DS7 and DS10 both lead here.
These fields of Golden Lotus have been tended without pause for millennia. The reason becomes clear upon inspection: the harvesters are flesh golems, bound to their task long after their creators vanished. Once a dozen labored here, but time has withered most of them. The broken remnants of their bodies lie scattered among the blossoms, half-buried beneath golden petals.
The surviving golems toil mindlessly, plucking flowers and depositing them into ancient stone troughs. They ignore intruders unless interfered with. If anyone harms them or attempts to halt their labor, they fly into a berserk rage and attack.
DS8: Main Stair#
The carvings represent the city from where the malborne
people originated.
DS9: Shedu#
When the heroes investigate this chamber from DS6, DS7 or DS8, read the following:
When the heroes enter the chamber, read the following:
The Shedu (appendix B) is lethargic, its will smothered by centuries of lotus exposure. Its rage and desire for chaos and ruin have been quenched by its addiction. It shows no hostility unless attacked or forcibly roused.
If asked questions, it will use its telepathy to answer two or three, before it grows tired and its responses end.
On Hexia: “The green whore of envy coils above this isle, feeding on love and weakness. She was worthy prey … once.”
On Defeating Hexia: “Two fangs remain for the dragon witch. They will find her heart, if your hands do not tremble. I … no longer recall where I left them.”
If the shedu is forced into battle it has the Poisoned conditioned.
Treasure**.** Scattered at the back of the cavern is a pile of coins. There is 130 PP, 2,400 GP and 14,000 SP. These coins are minted with imagery from a civilization unknown to the heroes. Among the coins is a quiver with two Arrows of Dragon Slaying inside. These are all that remain of the lamassu’s final gift.
DS10: Stairs#
The stairs ascend 700 feet to the top of the arch. Refer to Top of the Arch in area DS7 for more information.
Lair of the Kraken#
While it is unlikely that the heroes will explore this area on their first trip to this island, they may return in chapter 10 in search of the Orb of Dragonkind.
Lair of the Kraken Key Locations#
DK1: Surface Islet#
The jagged rock island is several hundred feet from shore. This rocky protrusion was created by underwater volcanic activity, with volcanic gases venting through cracks. This
underwater volcano is the lair of the Kraken, perhaps the single most dangerous creature in all of Thylea.
The Kraken serves only itself. It is the enemy of every other living creature in Thylea, including the Titans. It bears a strong hatred for Sydon, who has foiled many of its schemes to wrest away control of the oceans.
The Kraken spends about a fifth of its time in its lair and the rest of its time traveling. It roams the oceans around Thylea and travels to other planes of existence using a cubic gate. This means that there is a 20% chance that the Kraken will be home when the heroes visit.
DK2: Underwater Tunnel#
The Kraken’s lair is in the dark, crushing depths—nearly a mile beneath the ocean. It is accessed by an underwater tunnel. Reaching the tunnel is a difficult proposition due to the intense pressure at those depths.
Diving into the Depths. Volkan can construct Dive Suits for the party. This is the only realistic possibility for getting down into the lair of the Kraken without using powerful magic. Each Dive Suit takes Volkan one week to construct and resembles an unwieldy suit of plate armor with an oversized helmet. The suit is entirely airtight. Refer to appendix C for more information on the Dive Suit.
Using a dive suit, it takes one hour to reach the Kraken’s lair. For each hour spent in the lair, there is a 20% chance that the Kraken will return.
Reaching the Tunnel Entrance**.** If the heroes descend into the ocean using Volkan’s suits, then read the following when they approach the tunnel:
The tunnel goes horizontally into the side of the volcano for 100 feet before reaching the Kraken’s lair.
DK3: Kraken’s Silver Sphere#
Read the following when the heroes get to the end of the tunnel:
The engravings depict every god known to the world. A few have dulled to a mottled gray, their once pristine faces rough and corroded. These are the fallen gods, their divine spark long extinguished. The Kraken studies them obsessively, for it counts every deity as its enemy. Born as a divine weapon and cast aside when its purpose was fulfilled, it was condemned to the Nether Sea with the other forgotten titans. But unlike the mindless horrors imprisoned there, the Kraken possessed a mind sharp enough to escape. Now it plots with cold patience, tearing down the pantheon one god at a time. It has already claimed more than one victim.
The Nalfeshnee**.** A Nalfeshnee guards this chamber, bound in servitude to the Kraken. A grotesque tyrant originating from Hades, it once tormented imprisoned souls for sport, reveling in misery and believing all beings guilty. Now, shackled by an Oath of Service (append it regrets, the fiend must defend the lair or suffer punishments worse than death within Hades. When intruders arrive, it attacks with desperation.
The Kraken’s Treasure**.** Though the silver plating the walls would be worth ten million silver pieces if it could be harvested, the Kraken’s true hoard lies at the sphere’s floor. Piled in gleaming drifts rest 15,000 GP and 3,500 PP, gathered from ships that it has destroyed or merfolk settlements it has pillaged.
The Kraken possesses two mighty artifacts, tools in its war against the gods. One is a Cubic Gate, used to slip between planes in pursuit of secrets and allies. It never leaves this artifact unattended; if the Kraken is absent, so too is the cube.
The Orb of Dragonkind**.** The pride of the Kraken’s collection is an Orb of Dragonkind, displayed upon a gilded pedestal like a trophy of divine betrayal. How it acquired such a relic is unknown, though whispers speak of grim bargains with fiends from Hell, Hades, or Gehenna. The Kraken intends to wield the orb when the Five Gods reclaim their true forms, binding dragons to its will and using them in its war against the gods.
The Orb of Dragonkind can be used as a weapon against the Nether Dragon in chapter 10.